JCards Screenshots and Help
- Starting out
- Define some fields
- Define a category
- Set field category
- Delete a field
- Changing a fields order
- Create a record
- Edit a record
Starting out

When you start JCards for the first time you will be presented with this screen. The blank line underneatch the toolbar indicates that no fields have been defined yet. Below are some steps to define a simple address book.
Define some fields

Either select the DB | Fields... menu option or click the ![]() button on the toolbar to start defining fields. The screen at left will be shown.
button on the toolbar to start defining fields. The screen at left will be shown.
Add a field
 Click the
 Add other fields
Now add other fields as shown below:


Edit field type
You should now have fields defined that look something like this:

If you decide that maybe it would be better if the Notes field was a multi-line field you can edit it.
To do so either double click the field or select it and click the ![]() icon.
icon.

Changing the fields type to Memo allows you to set the number of memo lines. Click the
![]() icon until you get back to the main screen. Note that the first field
has been added to the visible fields list (see preferences) and used as a column heading.
icon until you get back to the main screen. Note that the first field
has been added to the visible fields list (see preferences) and used as a column heading.
Define a category

Either select the DB | Categories... menu option or click the
![]() icon to open the Categories dialog.
icon to open the Categories dialog.
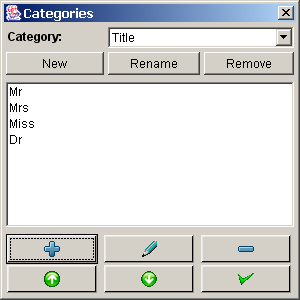
Click the New button and enter a name of Title. Title should be selected in the Category:
choice box. Now click the ![]() icon to add category items.
I suggest Mr, Mrs, Miss and Dr.
icon to add category items.
I suggest Mr, Mrs, Miss and Dr.
Click the ![]() icon to close the dialog.
icon to close the dialog.
Set field category

Go back into the fields dialog and add a new field. This time because a category has been defined you can set the field type to Category. You can also set a default which must be one of the existing Category items.
Deleting a field
We now decide that the Age field is not that useful and want to get rid of it. Select it in the fields window and click theChanging a fields order

We now decide that the Title field should be the second field. Select it and click the
![]() or
or ![]() icons
to move it to the right position.
icons
to move it to the right position.
Click the ![]() icon to close the dialog.
icon to close the dialog.
Create a record

On the main screen either select the Edit | New card menu option or click the
![]() icon to create a new record (or card = JCards).
Note that because the Name and Address fields are mandatory their labels are in bold to remind the user. Also
note that the default for the Title has been automatically selected and the date format for the Date of birth is shown.
icon to create a new record (or card = JCards).
Note that because the Name and Address fields are mandatory their labels are in bold to remind the user. Also
note that the default for the Title has been automatically selected and the date format for the Date of birth is shown.
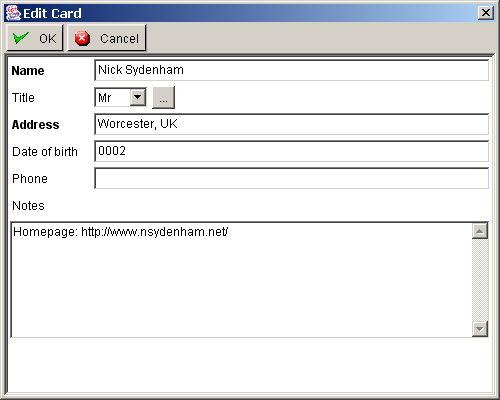
Enter values as appropriate and click the ![]() icon to close the dialog.
If you had entered an invalid date JCards would have reported an error and not let you save the record.
icon to close the dialog.
If you had entered an invalid date JCards would have reported an error and not let you save the record.
Edit a record

To edit an already entered record you can either double click it, select the Edit | Edit card menu option or click the
![]() icon.
icon.